Showing posts with label carla emery. Show all posts

Monday, June 16, 2014

The Campfire Kitchen

Are you taking to the trails this summer? Complete your camping experience with the perfect campfire kitchen setup. Follow Carla Emery's helpful tips for making a tasty meal outdoors, and if you need a dish to pair with your newfound kitchen knowledge, check out this recipe for mouth-watering Herb-Stuffed, Pan-Fried Golden Trout.

You need a good place to build your fire and plenty of fuel for all its stages. You will be glad for a work table - maybe a plank between two stumps, so you don't have to set everything on the ground. Anything that can be cooked in frying pans, kettles, or reflector ovens can be managed with a campfire. Don't use pans with handles that will burn. Handles that aren't metal will promptly burn or melt. If they're all you have, let them do it, and then you can get on with it. Stick to simple ingredients and simple procedures when you're cooking, because you didn't bring your kitchen. If you are able to plan ahead to do all your cooking over an open fire, you especially need one or two cast-iron frying pans, a Dutch oven, a campfire coffeepot, and a big pan to heat dish and washing water in. A folding grill to hold pans secure and level is very helpful.

Starting a Fire
Campfire cooking means starting a fire and controlling it until you don't need it any more. There's a real skill to it, which you'll acquire with practice. The easiest way to do camp cooking is to pack a proper wood cookstove, set it up in your camp, and use it. Gather wood on dry days and store it under shelter to use on wet ones. You can do this in a semi-permanent camp. If you're living on the trail, start a fire like this: Lay a little mound of really flammable dry stuff in an open place, on dirt or sand if you can, and away from dry brush or grass. (Please don't start a forest fire!) Place very loosely wadded toilet paper, dry grass, the wrappers from tin cans, or one of my book brochures crumpled up on top of that. You crumple it because paper doesn't burn well flat. You've got to get air in there. Now make a tipi of very slender dry sticks over that, then bigger and bigger ones over that. Set aside some yet bigger ones to add later. Use 3 matches bunched together to start the fire.

Frying
Try to allow enough time to let a good roaring blaze burn down to coals. When desperate, though, you can fry on a flame. Have a circle of big flat-topped rocks around the outside of your fire circle. They will help hold the heat.

Stewing
Just make a place for your kettle down in there among the rocks. Some tribes of native Americans cooked their meat by digging a hole, lining it with a hide, filling it with water, and then adding hot rocks and pieces of meat. This had to be the first crock pot!

Building a Mud Oven
If you have clay soil, this is a natural. Start by building a strong, dome-shaped frame of willow branches and sticks about 2 feet wide by 3 feet long. Cover your branch canopy with a layer of mud 6-12 inches thick. Cut a square opening at one end to be your oven door. At the top opposite end, insert a large tin can that is open at both ends; that will be your chimney. After the mud is completely dry, build a fire inside and burn out all your wooden framework. Cool and scrape the insides clean. To bake in your mud oven, first build a fire inside it and heat the mud to red-hot. Then rake out the fire and put in your sourdough bread, bannocks, stew, or roast. Close the door with a slab of flat rock, and it should bake wonderfully.

Monday, June 9, 2014

The Care and Keeping of Worms: Creating a Worm Bin & Feeding Worms

Thinking of adding a worm bin to your home? Worms are great for fishing, recycling kitchen wastes, and for your garden soil. The Encyclopedia of Country Living has a wonderfully comprehensive section on building a worm bin and general care and keeping of your new friends. 

(Start from the very beginning! Learn about buying worms here)

Materials
Your worm bin can be made of wood, metal, or plastic. All are equally good, but if you use wood it should be exterior-grade and not aromatic, because aromatic woods (redwood, cedar, etc.) are hard on the worms. Wooden worm boxes wear out. If you let the box dry out once in a while, it will keep longer; building 2 boxes and alternating them allows for that. Painting the wood with something like polyurethane varnish or epoxy also helps protect the wood. Otherwise a wood box will last only 2 or 3 years. If using a ready-made container, be sure it was not used to hold pesticides. Thoroughly scrub any plastic container you use. You can build or place your bin outdoors if you live in a mild climate.

Size
The container should be no deeper than 12 inches; 8-12 inches is a good size. The worms tend to stay on the surface, so a deep container is unnecessary and will only encourage the growth of smelly microorganisms, which live where there is little or no oxygen. The width of your bin depends on how much organic garbage your household produces, if you're using the worms to recycle garbage. Your bin should have 1 square foot of surface for each pound of garbage you'll be adding per week. (An average person produces about 2 lb. of garbage per week.) So for a family of 2, a 2 x 2 x 8-foot bin is generally good.

 Basic Worm Care
The less you mess with the worms, the better. Feeding them once or twice a week is sufficient. While feeding, note whether their bedding is staying moist and any other changes. As the worms eat the food and bedding, you'll see more castings. This higher proportion of castings to bedding is not the best thing for worms. If your worms are for bait, get them out of there before they start shrinking instead of growing. On the other hand, if your goal is to grow rich humus for your garden and house plants rather than fishing worms, you can let the worms stay in the bin longer.

Worm Beddings
Worm beddings not only provide moisture to the bin but also give you a place to bury the garbage. If left a long time, the bedding would be entirely converted into castings by the worms. (You won't leave the worms in the bin that long, though.) The lighter the bedding, the easier it is for the worms to make their way around the box.

Worms in nature enjoy living in organic material such as decaying leaves and rotten logs. Soil is not a necessary bedding ingredient, although you might want to add a handful to the bedding to help the worms' gizzards break down the food. But soil is heavy, and too much makes your bin difficult to move around. Powdered limestone is also a good addition: It adds grit, reduces acidity, and provides calcium for worm reproduction. Or you can use pulverized eggshells for calcium.

NOTE: Do not use slake or hydrated lime. It will kill your worms.

Worm Food
Too much food will "sour" your worm bed; the worms won't be able to keep up, and it'll smell bad. If you give them too little food, your worms will start getting smaller, and some will die. This happens if your worms have reproduced more worms than your garbage or other feeding schedule can handle. Their population will stabilize at the amount your food for them will support. Over time you'll get a feel for how much to feed.

Growing bait worms and harvesting them regularly calls for regular feedings. Worms for vermicomposting can get fed as much kitchen garbage as you have. You can let it build for a few days and give it to them once or twice a week.

How to Feed
 As you dump the food out on top of the bin, don't always put it in the same place. In fact, try to put it in a different place each time on about a nine-day feeding cycle. Dig a shallow hole, put the garbage in it, and cover with 1 inch of bedding. Covering the bin with a plastic sheet holds in moisture.

Worm Food Mix
 1 part screened topsoil and 1 part vegetable matter (grass clippings, kitchen waste, etc.). Peat moss is more water-absorbent than food scraps. If the manure is fresh, add more topsoil to prevent heating. Heating forces the worms to the bottom of the bin, where they won't eat or breed. The topsoil also absorbs odors and adds body to the mixture. Add chicken mash or cornmeal to provide the carbohydrates, protein, and fats the worms need for nutrition and to help in the formation of egg capsules. Mix very well.

Thursday, March 20, 2014

Using a Cloche for Early Spring Gardening


Cloche: A cloche (pronounced "klosh") is a lightweight covering for a plant or plants that can easily be moved. A cloche is the simplest cover to build and use. It can easily be moved to different parts of the garden to cover different plants. When the cloche is put on over tender young plants in early spring, it's called a "hot cap." Unlike cold frames, cloches allow light to reach a plant from every direction. 

You can reuse cloches to cover as many as 3, 4, or more crops in the same year. Cloches are especially well suited for use in the maritime Northwest, where plants need protection from excessive rain and cold winds more than from very low temperatures. The weaknesses of cloches are their vulnerability to heavy wind and their inability to keep plants as warm as cold frames or greenhouses.

Cloche Materials. A cloche can be made of anything that transmits light, so the possibilities for design are nearly limitless. They can be made of cheap materials - cheaper than those needed to make a cold frame or greenhouse. 

To cover a row of plants or a section of garden, you can build one large cloche or a series of modular cloches that link together. The word "cloche" is French for bell. In Europe, gardeners have covered plots for centuries, and in the 1600s, French market gardeners used a glass jar in the shape of a bell to cover a plant. Now cloches for individual plants may be made of waxed paper, plastic, fiberglass, or glass. Or your cloche may be a big, plastic-covered tunnel or tent that covers entire rows of plants. A wide variety of cloches are available commercially, with an equally wide range in prices. When open-air gardening begins in the summer, wash your cover material, dry, and store in a shady place until needed in the fall.

Homemade Cloche Design. You can scrape together a cloche by making half-circle hoop rows out of old coat hangers and then covering them with plastic. Or cut out the top, bottom, or side of any 1-gal. plastic or glass jug. To cover a wide raised bed, use sections of hog-wire fencing curved to fit the beds and covered with plastic.
  • Tunnel: In general, the tunnel style is made by stretching 4-mil polyethylene plastic sheeting over a line of half-circle hoops. The hoops are bent and fastened to strips at the top and bottom sides so they will stay put. For example, you could put the plastic over 6 x 6-inch mesh concrete-reinforcing wire. The reinforcing-wire cloche looks like the tunnel style except the wire is arched from where it is nailed to a 10-foot lumber plank over to the other side, where it is nailed to a parallel plank. Then the plastic is put over that. The 2 end openings are covered with more plastic.To ventilate a tunnel cloche, on cloudy days you open the end away from the wind. On sunny days you can open both ends. A breeze is created by the warm air leaving the cloche. As the weather gets warmer, you'll be able to leave one end open continuously. When the weather gets hot, of course, you take off the plastic and put it away until fall, when the weather gets cold again.
  • Tent: This cloche is lighter, portable, and easier to build than the tunnel. It has 4- or 6-mil polyethylene plastic sheeting stretched over an umbrella-tent-style support.
Using a Cloche. Cloches can be placed over any area of your garden, large or small, that you want to protect. To water, weed, and harvest, you lift the cloche off the bed, tilt up one end, or take off the plastic. If your cloche has no natural opening, you must remember to ventilate by propping up one side.

Tuesday, February 11, 2014

Homemade Treats for Valentine's Day


This Valentine's Day, don't worry about buying flowers or making dinner reservations — show your love with these thoughtful homemade (and delicious) gift ideas from Carla Emery.

Kisses: Beat 2 egg whites stiff. Add a pinch of salt, 1/2 cup of powdered sugar, and 1/2 t. vanilla. Drop from a teaspoon onto a lightly oiled cookie sheet. Bake in a 300 degree F oven about 30 minutes until firm and dry. Variation: Add 1/4 cup coconut, or 1 square chocolate, melted and mixed in.

Brandied Cherries: Boil 5 cups sugar with 2 cups water for 12 minutes, or until you have a clear syrup. Pour that syrup over 5 lb. cherries (the small sour kind) and let stand over night. Drain off the syrup and boil it again. Add cherries and boil about 5 more minutes. Take out cherries with a skimmer (the kind with holes to let the juice drain away) and put the cherries into canning jars. Boil the syrup down 15 more minutes. It should be getting pretty thick. Add 2 cups brandy. Remove from heat. Pour over cherries and seal.

Rose Geranium Cake: Sift together 2 cups flour, 1/2 t. salt, and 1 t. baking powder. Cream 1/2 cup butter and 1 cup sugar. Add alternately the flour and 2/3 cup water. Finally, add the unbeaten whites of 4 eggs. Whip hard for 5 minutes. Line a loaf pan with buttered paper and rose geranium leaves. Pour in batter. Bake in a 350 degree oven for 30-45 minutes. Pull the leaves off with the paper when the cake is done. 


Thursday, January 9, 2014

How to Start a Fire in a Wood-Burning Stove

Whether you live year-round in a home with a wood-burning stove, or if you're just cozying up in one for the winter, be sure to follow Carla Emery's step-by-step instructions for starting a fire in your stove. 


You want the wood just dry enough at burning time. It takes 6 months to a year to dry wood for burning. So spring-cut wood would be burned the next winter. Freshly cut (green) wood is about 50 percent water. It's heavy and burns "cold" (because all the energy it takes to evaporate that water). It also deposits a lot of flammable creosote in the chimney. Even well-dried wood is still 12-20 percent water. That's just right for burning. It's still damp enough to be a calm and manageable fire. If the water content is under 10 percent, you have to "tinder-dry" wood. This makes great kindling because it burns fast and hot. To burn tinder-dry wood you may have to damp down the airflow regulators to reduce the oxygen supply to keep from overheating the stove, or your home, and that lack of oxygen for the fire also tends to deposit creosote.

STARTING A FIRE:
On very cold mornings, if there is no other heat, I let the children build the fire. It keeps them occupied while the house is warming up. Otherwise, they just stand around the cold stove and complain. The basic idea is this: You strike a match to get enough heat to light paper, which will burn and create heat enough to light kindling, which will burn and create heat enough to ignite bigger, and then bigger, hunks of wood, which will burn with enough heat to kindle coal. That's because each thing has its "kindling point," meaning the lowest possible temperature that has the lowest kindling point (the match) and work your way up.

Laying Burnables into the Stove. Separate sheets of newspaper. Wad them up individually and put them into the firebox. Or use any discarded papers or paper containers. Add some of your most finely cut kindling on top of the paper, then a few bigger chunks of wood on top of that, then a couple of yet larger sticks on top of that. Arrange all the wood in as open a style as possible, not pressed together so that lots of air can get in there. Not only does the fire in general need air, but at first every individual stick needs an air supply. I carefully arrange them log cabin or teepee style to ensure this. Once it gets going you needn't be so particular. And start with plenty of sticks. One stick of wood never burns well alone. (There's some profound philosophy there if I ever get time to ponder it--a sermon even.) Now light the paper with a match as near the bottom as you can.

Adjusting the Dampers. Fire travels up. Always start your fire with all the dampers wide open. As the fire gets going, keep it supplied with fuel of the appropriate size for the stage it's at. As it gets going better you can gradually cut back on the draft. You will waste fuel and have a hard time heating your stove and oven if you let all your hot air go directly up the chimney, which is what it will do with all the dampers left open. So when your fire is going really well, cut back the draft--by turning the damper in the stovepipe--until it starts smoking. Then turn it back enough so you have no smoke. If the chimney damper is shut too tight, you'll have smoke all over the place. If it's open too wide, the fire will roar and consume like crazy--but it won't make the room warm. Close the damper at the back or to the side of the firebox, shut or almost shut. Adjust your front damper to the point that the fire's health seems to require. The hotter your fire the more dampening it can stand. If your fire is too slow, give it more air. If your fire still isn't burning well, try loosening up the pile of fuel.

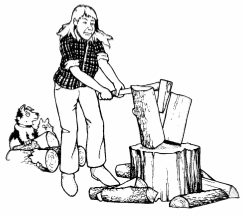
[Adapted from the "Wood Heat" section of Chapter 6: Tree, Vine, Bush & Bramble. Other topics include: Managing an Existing Stand of Trees; Reforestation; Harvesting Wood; Air Pollution; Stove Shopping; Repairing a Wood Stove; and Cooking on a Wood Stove. Illustration copyright 1994 by Cindy Davis.]

Monday, December 23, 2013

Winter Weather Beverages: Spiced Cider, Mulled Red Wine and More

Hosting a holiday gathering? Keep your guests full of Christmas cheer with Carla Emery's recipes for delicious mulled beverages. 

You can mull any juice by adding sugar and spices and heating to a boil. Then simmer 10 minutes, strain, and serve hot. Grape juice, orange juice, cider, and red wines mull especially well. Spices invariably include cloves and cinnamon sticks. Whole allspice, nutmeg, and ginger are other possibilities. Lemon juice and lemon slices are good too. Sweeten with your favorite sweetener. Be sure to strain unless all will be consumed immediately. The longer the whole spices are in it, the stronger the drink gets--and it soon becomes too bitter to enjoy!

SPICED LEMONADE
Put 2 qt. water, 4 T. sugar, 3 cloves, and about 2 inches of stick cinnamon into a pan. Bring slowly to a boil, strain, add the juice of 4 lemons, and reboil. Serve with a slice of lemon in each glass.

MULLED RED WINE
Use the cheapest red wine you can find (it will still be good). Heat 1 qt. wine and add 1 stick cinnamon, juice of 1 lemon, 1/2 c. sugar, 8 cloves, and 1/2 lemon sliced into sections. Strain. Serve with a slice of the lemon in each cup. Good for the old, cold, weary, and disheartened--a medicinal substance. Mull port or sweet wines without adding sugar.

MULLED CRANBERRY CIDER
Mix 4 c. cider (or grape juice) 4 c. cranberry juice, 6 cloves, 1 stick cinnamon, 4 whole allspice, and 1/2 c. brown sugar. heat until the sugar dissolves, and serve hot.

SPICED CIDER
Mix 4 c. cider, 2 whole allspice, 2 whole cloves, and about 3 inches of stick cinnamon, and boil 5 minutes. Add 1/2 c. brown sugar, boil 5 minutes more and serve hot. 

CIDER PUNCH FOR A CROWD
Squeeze 1 orange and 1 lemon. Combine the chopped peels, 1/2 c. sugar, 1 stick cinnamon, 1/2 t. whole allspice, and 4 c. water. Boil gently 30 minutes. Strain; add the orange and lemon juice and 2 qt. cider. Reheat and serve.

MULLED GRAPE JUICE
Combine 4 c. grape juice (dilute if it is very strong), 4 sticks cinnamon, about 1/4 c. sugar, and a dash each of nutmeg, cloves, ginger, and powdered cinnamon. Bring to boil and serve hot.

HOT SPICED TEA FOR A CROWD
Combine 3 qt. boiling water, 3 T. tea leaves, 2 sticks cinnamon, and 1 t. whole cloves. When your tea is strong enough, strain and add 3/4 c. sugar, 1/2 c. lemon juice, and 1 c. orange juice. Reheat. The "tea" leaves can be whatever kind you prefer--raspberry, strawberry, rose hip, etc.

Thursday, November 7, 2013

Preserving Your Halloween Pumpkins


Halloween may be over, but prime pumpkin time is just beginning! Carla Emery offers a few tips for enjoying your pumpkins and squash after October 31st using different methods of preserving and cooking.

Preserving Squash or Pumpkin
Freezing. Cut open your winter squash or pumpkin. Remove stringy fibers and seeds (save them for seed or snacks). Cut into pieces and cook until soft in as little boiling water as possible. Or steam in a pressure cooker or bake in the oven. You can bake a whole big squash; it takes about 2 hours. Then you cut open, remove seeds, and mash. Or bake or boil sections and, after the squash is cooked, scrape off the rind and mash the insides (use a masher or rotary colander or push through a sieve). (Using a masher is by far the easiest way.) Then package and freeze. There's no good way to cool it, so just don't put more in the freezer than it can handle each day. I thaw a bag of frozen squash in a frying pan with a little water, butter, and honey. Mix well and serve hot.

Substitute for sweet potatoes on Thanksgiving or at any other time. Around here, squash is much cheaper and easier to grow than sweet potatoes. You can use it in pies or add it to bread dough.

Drying. Pioneer Americans dried pumpkins a lot. Their method was generally to slice the pumpkin around in circles, scrape out the seeds and strings, peel it, and let the circles hang in the air, out of direct sunshine, until they were dried. Another method: Cut into small pieces, seed, peel, cut into 1-inch strips, and cut those 1⁄4 inch thick. Or shred it. Dry until tough.

Squash/Pumpkin Leather:  Cook and puree. For each 2 c. puree, add 1⁄2 c. honey, 1⁄4 t. cinnamon, and 1⁄8 t. each of nutmeg and cloves. (Other options: Combine with apple  puree. For spices, substitute ginger and pumpkin pie spice. Sweeten with white or dark corn syrup rather than honey. For each 1 c. steamed squash, pumpkin, yam, or sweet potato, add 1 c. mashed banana, 1  t. pumpkin pie spice, 1⁄2 t. vanilla, and 1⁄2 c. chopped nuts; dry like a fruit leather.)

Canning. Wash; remove seeds. Cut into chunks and peel. Cut the peeled chunks into 1-inch cubes. Add just enough water to cover. Boil 2 minutes. Optional: Add salt. Put chunks into clean canning jar. Pour cooking liquid over, leaving 1 inch headspace. Caution: Do not mash or puree before canning. Process pints 55 minutes, quarts 90 minutes, in pressure canner only. If using a weighted-gauge canner, set at 10 lb. pressure at 0-1,000 feet above sea level; set at 15 lb. at higher altitudes. If using a dial-gauge canner, set at 11 lb. pressure at 0-2,000 feet above sea level; 12 lb. at 2,001-4,000 feet; 13 lb. at 4,001-6,000 feet; 14 lb. at 6,001-8,000 feet; or 15 lb. above 8,000 feet.

Cooking Squash and Pumpkin: Basically you start any recipe by boiling, baking, or pressure-cooking the flesh. If you then mash, you've got the equivalent of the canned pumpkin that is called for in most recipes. Just substitute from there.

Boiling. Halve the fruit and scoop out the seeds and stringy fibers that are mixed up with them. Peel and cut what's left into cookable-sized pieces. Boil until tender (a half hour or so). To pressure-cook, cook the peeled pieces 15 minutes at 15 lb. pressure.

Baking. Arrange your peeled pieces cut side down in some sort of baking pan. Bake about an hour at 400˚F. Then scoop out the part that stayed soft and mashable. Another system is in Ruth's Vegan Squash Pie recipe a bit later on. Of that one, Lane Morgan says, "That's how I always prepare my pumpkins for pies, except I scrape out the seeds before I bake because I don't know how good they'd be for roasting after being cooked in all that moisture. You don't have to peel or chunk the pumpkin, and I hate peeling pumpkin. Don't use a rimless baking surface because the pumpkins will 'weep' as they cook. I save that liquid to get the puree going in the blender."

Instant Mashed Squash/Pumpkin. Blend 2 c. cut-up pumpkin with 1⁄2 c. water until smooth. If you aren't going to use your puree in a recipe where it will get cooked, you can cook it plain in a pan, but you have to stir constantly to prevent burning.

Tuesday, September 10, 2013

A Fond Fall Welcome to Apple Season


September means apple season. Just over the mountains, Eastern Washington apple orchards are brimming with fruit. Washington state grows the best apples in the world (though I suppose I’m a little biased).

Maybe you are lucky enough to have access to these beautiful orchards, or maybe you’ve just noticed apples on sale at the local grocery store. Either way, now’s the time to stock up on delicious Washington apples. With some clever preserving techniques, you can find yourself eating local apples all year long.

Canning Apples
Wash, peel, core, and quarter or slice your apples. Drop into a solution of 2 T. salt and 2 T. vinegar per 1 gal. of water. That prevents darkening. Then drain, rinse, and boil them for 5 minutes (in either thin sugar syrup or plain water). Then pack your hot fruit into hot, very clean jars, leaving 1⁄2 - inch headspace. Pour boiling liquid from the cooking over up to your headspace limit. Put on lids. Process in boiling water — for either pints or quarts: 20 minutes at altitudes 1,000 feet and lower; 25 minutes at 1,001–3,000 feet; 30 minutes at 3001–6,000 feet; and 35 minutes at above 6,000 feet.

Canned Applesauce (and Other Fruit Purees)
I make lots of applesauce. It’s a good way to preserve apples that wouldn’t keep otherwise. Cut large fruit into pieces. Simmer until soft. Add a small amount of water, if needed, to prevent sticking. Put through food strainer or mill. Add sugar to taste. Reheat to simmering (185–210˚F) and pack hot into hot jars, leaving 1⁄2 - inch headspace. Adjust lids, and waterbath can. From sea level to 1,000 feet altitude, process pints 15 minutes, quarts 20 minutes; from 1,001 to 3,000 feet, process pints 20 minutes, quarts 25 minutes; from 3,001 to 6,000 feet, process pints 20 minutes, quarts 30 minutes; above 6,000 feet, process pints 25 minutes, quarts 35 minutes.

Freezing Apples for Pie
For apples to use in making pies and so on, just wash, peel, core, and slice them. About 50 lb. of apples will make about 35 frozen pints. To keep them from turning dark, quarter (or slice) them into a solution of 1⁄2 c. salt per 1 gal. water. Or else dunk them into boiling water for 11⁄2–2 minutes. Then drain the apples, rinse them under cold water, and drain again.

Method 1:
Scald, drain, chill, cover with a thin syrup (1 c. sugar per quart of water plus 1⁄2 t. ascorbic acid), leave headspace, and freeze.
Or Method 2:
Mix 1 qt. apple slices evenly with 1 t. ascorbic acid and 1⁄2 c. sugar. Then put into plastic bags or freezer boxes, seal, and freeze.
Or Method 3:
No sugar. Just pack ’em plain. The slices break apart quite easily while still frozen for making apple pie or crisp, or you can add a small amount of water and make applesauce.
Or Method 4:
Freeze whole apples, unpeeled. Just wash, put into plastic bag, seal, and place in freezer. To use frozen whole apples, thaw under cold running water until they can be peeled. Then remove the core and slice. (Work fast; an apple that thaws before peeling darkens.)

Freezing Applesauce
Applesauce turns out nicer, I think, canned than frozen, but you can freeze it by just making it, then cooling, packaging, and freezing.

Drying Apples
You have to slice them; they aren’t dried whole. Fully ripe sweet apples are ideal. Usually they are peeled and cored and what’s left is made into doughnuttype rings about 1⁄4 - inch thick to oven dry, 1⁄8 - inch to sun dry. Let the slices fall into cold water while you are working to prevent “rusting,” 1⁄4 c. lemon juice or 1 t. ascorbic acid per 2 c. cold water. If your apples are small, wormy, or too mealy to make into doughnut rings, cut into slices of whatever shape you can. Old-timers then strung them on a thread and hung them in the sun, but now we usually just spread them out on a surface. Using an oven or dehydrator, dry them at 140˚F on a cookie sheet — turning once in a while — until they are leathery.

Wednesday, August 21, 2013

Harvesting Grain the Environmentally-Friendly Way


Gas-powered mowers and machines aren't the only way to mow your lawn or harvest your grain. Carla Emery shares tips for picking the right environmentally-friendly tool to use in your yard and field. 

Sickle. You can cut grains and grasses with a sickle. (The sickle-bar tractor mowers used to cut hay aren’t suitable for grain because they run over it, shelling out some of your grain.) Lightweight hand sickles are available at most hardware stores. The sickle is best for short, rough, or patchy growth. It has a short handle and a long blade, which may have a straight or a serrated edge; serrated is better for grain cutting. The sickle was humankind’s first harvesting implement, but even a very strong and hard-working person couldn’t cut more than half an acre a day with one. It a misery to the back to use it for very long because for each cut, you have to bend over in order to cut near ground level: grab a clutch of grain heads with one hand; put in the sickle blade with the other, starting on the opposite side of the grain stalks from you and pulling it toward you with a sawing motion. The goal is to cut the stalks with such a gentle motion that you minimize the loss of grain to spillage. If you can cut the heads higher up on the stalk, it’s not so hard on your back, and that’s the way it’s done with a “harvest knife.”

The Harvest Knife. An Asian version of the sickle is the harvesting knife. It’s small. You hold it in your hand, bend your finger around the plant stem, and sever it. You continue holding the grain head in your knife hand and cut new ones to add to it until you get a handful, which is then transferred to the other hand until it’s holding a bunch large enough to bundle or put in a container. The blessing of this method is that it works very well with grain that has fallen over or that has unevenly ripe areas in the field or on various parts of the plant itself.

Scythe. A scythe is far better than a sickle for harvesting grain. There are different styles of scythe for grain, weed, or bush mowing. A scythe has a handle about 6 feet long, called a “snath,” and a long, gently curved blade, which is the “scythe” proper. The snath has a handhold on it that enables an easy, comfortable, swinging motion, each arc swinging into the grain in front of you and cutting a swath about 2 feet across. (Trying to go wider can do more harm than good to your motion.) The scythe’s blade should come against the grain at about a 45˚ angle rather than squarely, at a 90˚ angle. Cut the stalks about 3–4 inches above ground. If there is no cradle, just let them fall in that long swath.

With practice you’ll soon get a natural, rhythmic, unhurried but steady motion with it that you can keep up for a long time and actually enjoy. You’ll discover that scything in different varieties of grain differs as stalk stiffness differs. In general, barley and rye are easier to cut than wheat. In old-time harvests, mowing (what scything is called) was done by a group of men moving through the field of golden grain side by side. Their carefully measured movements were subtly synchronized so as to cut all the grain in front of them and yet not collide with each other, like the motions of a well-trained rowing crew. An experienced scyther can cut 1 or 2 acres a day, laying the grain evenly in a swath. For a beautiful description of how to use a scythe, read “Grow Wheat in Your Garden,” Organic Gardening, January 1972. For more on how to mow hay, chop weeds, and bring in small grains using hand tools, get The Scythe Book by David Tresemer (1980).

Scythe with a Cradle. This works best of all. The “cradle” is 4 fingerlike wooden rods, which look like oversized fork tines, attached above the blade of the scythe. The scyther is now called a “cradler.” The cradle catches the wheat in its fall as the scythe cuts it. The motion of the scythe and cradle’s swing causes the wheat to form a pile. After several strokes of the blade, the cradle gets full of cut grain and is emptied into the bundler’s arms or tossed out in one heap for you to come back later and make into a sheaf. To dump the cradle, bring it back and up in order to let the grain slide gently into a neat pile on the ground. You can buy a scythe from Cumberland General Store or Lehman’s (they also offer replacement snaths and hardware to put them on: 888-438-5346; www.lehmans.com). It’s important that either sickle or scythe be kept sharp. Lehman’s also sells sickle grinders for this purpose. The old-timers say that for grain, you should whet the blade with a rough stone; for grass, use a very fine-grained one.

Monday, August 5, 2013

Berry and Fruit Picking Tips & Tricks


BERRY PICKING
When you pick berries that have thorns, wear long stockings with the feet whacked off--not nylons--or some similar heavy protection on your arms so you won't get too badly scratched. A leather belt around your waist with a half gallon can hanging on it is handy, and then you can empty the berries into a big bucket when the little one is full. Don't worry about leaves and such when you're picking. You can put the berries in water when you get home, and leaves will float to the top; you can just scoop them away.


SECRETS OF FRUIT PICKING
1. Pick on a dry day because damp fruit is more likely to spoil.
2. Store fruit in a cool place soon after it is picked.
3. For safety's sake, pick into something that leaves your hands free. This could be a bucket hanging from your belt, or a fruit-bag that fastens around your waist and hangs like an apron down your front.
4. For least bruising and best condition, pick each fruit by hand.
5. Bend the fruit upward. Twist gently to fee it from the branch. A ripe fruit should easily separate. Keep the stem in the fruit. If pulled out, rot can develop in the hole.

PRE-TREATMENT FOR FREEZING FRUIT
Fruit can be packed for freezing without a sweetener or liquid. Fruits that will be eaten raw or used for pies or jams after thawing will be fine without a sweetener. Just slice or crush them in their own juice, or even freeze them whole.

["Berry Picking" and "Secrets of Fruit Picking" excerpted from Chapter 6: Tree, Vine, Bush and Bramble. Illustration copyright 1994 by Cindy Davis. "Pre-Treatment for Freezing Fruit" excerpted from Chapter 7: Food Preservation.]

Monday, July 15, 2013

Secrets of Proper Plant Watering

Don't risk losing your summer crop by improperly watering your plants — Follow Carla Emery's secrets for a healthy, well-hydrated garden.

1. Plants can absorb food from the soil only if it is in solution. So in effect, plants must have damp feet in order to eat.

2. A desert is usually rich farmland that happens to be lacking water. If you add water by irrigation, those arid lands will bloom. Only land whose topsoil has eroded or that has poisonous materials in the topsoil is true desert. Water supply and temperature are the two great determinants of what plants can be grown where.

3. The best time to water is in the morning. Plants do most of their growing during the day and need the water for photosynthesis. Watering in the morning also allows plants to dry out by evening, which reduces the chance of mildew and rot.

4. Mulching helps to keep soil moist as well as to suppress weeds. (But wait until the ground gets thoroughly warm before putting on mulch.)

5. Plant species differ a lot in water requirements. Vegetables need a lot of water; most vegetables are about 85 to 90 percent water. Flowers, trees, and bushes can all survive longer without water than vegetables.

6. Erosion happens when wind or water moves soil. If you garden or farm on sloping land, you risk erosion. Grass planted in strips across slopes, summer mulches, and winter cover crops help prevent erosion. Strategically placed diversion ditches also help.

7. Watering must be faithful. If stunted by water shortage, many vegetables never grow normally again.
 
8. Watering needs to be generous. Almost all vegetables produce much more with abundant water than with a skimpy supply. For a minimum, your garden needs about an inch of water a week, from either the sky or your irrigation system.

9. Surface runoff, puddling, and evaporation are all wastes of water.

10. For newly planted seeds, water often enough to keep the soil continuously moist—morning and evening, sprinkling every day until they are up. You want them to come up as fast as possible. The moist ground also helps discourage wild birds and the family poultry from digging up the seeds and eating them.

11. Once your plants are well started, give them a good soaking rather than morning and evening sprinkles. Light sprinkles encourage shallow root systems because unless the soil gets wet to the level of the deeper roots, the shallow roots develop at the expense of the deeper ones. But those shallow roots can’t do as good a job of finding soil nutrients. Because the surface of the soil dries out faster than the deeper soil, shallow watering also creates a vicious cycle in which more frequent watering is needed to keep the plants from wilting. Deep soakings, on the other hand, encourage deep root systems, and deep roots don’t have to be watered as often.

12. For that “deep” watering, you want to water until the soil is wet to a depth of 4 to 6 inches. How long that takes depends on how fast your irrigation system delivers water and how fast your soil type absorbs it. When the soil gets dry, water again, to a depth of about 4 inches.

Monday, July 1, 2013

Celebrate July 4th with Homemade Popsicles


If you're expecting a sunny 4th of July, you'll need some cool treats to help you celebrate until the evening's fireworks.  Carla Emery shares her recipes for easy and delicious homemade popsicles.

These are cheap, easy, and even more fun for children than going to the store. Children like strong, sweet juices like grape and cranberry for popsicles—but when kids are hot, anything will do. My little ones enjoy goat’s milk popsicles. Popsicle making is a nice way to use leftover juices from canned fruit, too.


OF HANDLES AND MOLDS
You can use wooden sticks for handles and sturdy small bowls or cans for containers—work up a collection. Or buy popsicle molds; Tupperware and Back to Basics carry them. If you have a big family or lots of small friends, I recommend getting at least 2 molds so you can have one freezing while they are consuming the other. You can even make parfait popsicles by freezing a layer of one color and then a layer of another color. My plastic holders soon got lost or fell apart, but then we substituted sticks in a bowl or can and were fine. Fill the molds not quite full, insert your holder, and freeze.

UNMOLDING
Don’t let the gremlins pull the holders until you’re sure the center of the popsicle is solidly frozen and you have loosened the sides by running hot water over the back of the mold. Otherwise they might pull out the holder prematurely, leaving a hole that it won’t freeze back into. You don’t have to unmold all the popsicles at once. Just loosen as many as you need. Refill the emptied units and return to the freezer.

BASIC FRUIT POPSICLES
Puree 1 cup any kind of fruit or a mixture of fruit and mix with 1 cup water. Pour into your ice cube tray. When they are starting to freeze, add a wooden stick or toothpick to each section. 

PUDDING POPSICLES
Susan Staley was in Germany when she sent me this recipe. She said, “If your children love the Fudgsicle-type popsicle, you can easily make them. Just make up a batch of pudding and freeze it in your popsicle molds. They’re delicious and you can make different kinds beside chocolate. Butterscotch is very good. In fact, any flavor of pudding your children love hot, they’re bound to like cold in hot summer weather.”

ANY FRUIT ICE
You could juice pomegranates or barberries or red currants, or cook and strain quinces, or grate pineapple, or boil and pulp apples or rhubarb—whatever you have. Sweeten to taste, add lemon juice if the flavor needs it, and freeze.

GINGER ALE JUICE
Combine ¾ cup sugar and 2 cups water. Heat and boil 5 minutes. Cool. Add 1 cup orange juice, ½ cup lemon juice, and 2 bottles ginger ale. Freeze.

Thursday, June 13, 2013

Early Summer Harvest: Beets!


It's been a sunny June in the Northwest, and beets are popping up everywhere — on restaurant menus, at farmers markets, and hopefully in your garden! Carla Emery shares tips on canning and preparing, and a few recipes for enjoying your beets. 

Canning: First scrub roots very well. Then precook by either baking or boiling because raw-packing is not recommended for beets.
  • Precooking by Baking. Cut off tops and roots. You can put beets of any size together in the oven (conventional or microwave). They're all cooked when the biggest one is done. Then pour cold water over the hot, roasted beets, and you'll be able to slip off their skins. Dump the water.
  • Precooking by Boiling. Remove the entire beet top except for the closest 1-2 inches of stem. Leave the roots on; that keeps them from "bleeding" (losing nutrients). Sort beets according to size, and boil similar sizes together so they'll get done at about the same time. When fork-tender (in about 30 minutes), move them into cold water. Slip off skins, stems, and roots.
  • Cutting Up. You cut up beets to improve and even out heat penetration in your jar. If baby beets are smaller than 2 inches wide, they can be left whole. If they're larger, cut them into 1⁄2 - inch cubes. Or slice 1⁄2 inch thick, and then quarter the slices.
  • Packing and Processing. Pack beets into hot jars. Cover with boiling water, leaving 1⁄2 inch headspace. Optional: Add 1⁄2 t. salt/pt., 1 t. salt/qt.; add 1 T. vinegar/pt., 2 T./qt. to preserve color. Process in a pressure canner only: pints for 30 minutes, quarts for 35 minutes. If using a weighted-gauge canner, set at 10 lb. pressure at 0-1,000 feet above sea level; set at 15 lb. at higher altitudes. If using a dial-gauge canner, set at 11 lb. pressure at 0-2,000 feet above sea level; 12 lb. at 2,001-4,000 feet; 13 lb. at 4,001-6,000 feet; 14 lb. at 6,001-8,000 feet; or 15 lb. above 8,000 feet.
Pickled Beets: Start by carefully scrubbing 7 lb. of beets (2 to 2 1⁄2 inches in diameter) to remove all dirt. Now trim off beet tops, leaving on 1 inch of stem and roots to prevent nutrient loss. Wash well. Sort by size. Cover size-grouped  beets with boiling water and cook until tender (25 to 30 minutes). Drain and discard liquid. Cool beets. Trim off roots and stems and slip off skins. Slice into 1⁄4 - inch slices. Peel and thinly slice.

Combine 4 c. vinegar (5 percent), 1 1⁄2 t. canning or  pickling salt, 2 c. sugar, and 2 c. water. Put 2 cinnamon sticks and 12 whole cloves in a cheesecloth bag and add to vinegar mixture. Bring to a boil.

Add beets and 4 to 6 onions (2 to 2 1⁄2 inches in diameter). Simmer 5 minutes. Remove spice bag. Fill pint or quart jars with hot beets and onions, leaving 1⁄2 inch headspace. Adjust lids. Process either pints or quarts in boiling-water canner. At up to 1,000 feet above sea level, process 30 minutes; at 1,001–3,000 feet, 35 minutes; 3,001–6,000 feet,  40 minutes; and above 6,000 feet, 45 minutes.

Pickled Whole Baby Beets Follow above directions, but use beets that are 1 to 1 1⁄2 inches in diameter. Pack whole; don’t slice. You can leave out the onions.

Preparing

Eating Baby Beets. Thinning beets has a really good side. You can eat the thinnings. Eat the tops like greens. If they're big enough to have roots of any development, eat both tops and roots together. I boil top greens and bottom root with bacon and add butter at serving time. Delicious! I like beets best of all at the "baby" stage - that's around 1 1⁄2 to 2 inches in diameter, about the size of a radish. Baby beets are also nice for eating, freezing, canning, or pickling.

Precooking Beets to Eat Fresh. Cut off tops. You may or may not leave a stub (leaving it prevents nutrient loss). Cover with boiling water, and boil until the beets are slightly soft to the touch. Another way to precook beets is to bake them in the oven. The bigger they are, the longer it takes. Drain and slip off the skins; no peeling is necessary. Cut off any remaining root tail and the stalk stub.

Recipes

Quick Beet Soup: Combine 2 c. milk, 1⁄2 c. beet juice, and seasonings.

Cold Beet Salad: Cook 1 lb. beets until tender. Cool, peel, and slice thinly. Combine 4 T. vinegar, 4 T. water, 1⁄2 t. sugar, 2 1⁄2 t. caraway seeds, 1 chopped small onion, 1 t. ground cloves, 1 bay leaf, salt, pepper, and 4 T. oil. Pour over  beets and let marinate several hours before serving.

Orange/Beet Juice: From Ruth of Bonaire: "Make fresh orange juice - enough to fill the blender two-thirds full. Then add 1⁄4 c. peeled, cubed raw beet. Blend and then pour through a strainer, a bit at a time, mashing pulp with a spoon to extract the maximum amount of juice. You can eat the pulp-it's sweet! This juice looks and tastes like red Kool-Aid!"


NOTE: Fresh garden beets have more color than most digestive systems can absorb, so your resulting bowel movement may appear to have “blood” in it. That’s just beet color. Eating beets is absolutely not harmful — on the contrary, beets are very nourishing. And they’re not harsh to digest, only startling to view in that manner.


Monday, May 20, 2013

Creative Solutions for Keeping Pests Out of Your Garden


If you grow it, they will come.  Critters don't understand property rights. Gardens are often and disastrously lost to predators unless the owner takes garden defense seriously. Identify the predator, or potential predator (the one that gets into the neighbor's garden). Then act to prevent the problem, or you'll risk losing what you're working so hard to grow. 

One general deterrent for deer, dogs, cats, and raccoons is the "garden cop," a sprinkler that sprays 3- to 4-second bursts of water when its electronic sensor detects an animal (or person). After squirting, it automatically shuts off and continues to scan the area for the next perimeter violation. "Garden cops" connect to your garden hose and are available from garden suppliers.

Birds, wild or tame, love to eat corn, bean, and pea seeds right after they sprout and before these plants are up a few inches. If birds are a risk, plant the seed extra deep and don't leave any showing. Firm the planted kernels so they stay down there until they germinate. A well-made scarecrow that moves in a breeze may keep them away, especially if it wears real people clothes, has shiny foil hanging strips for "hands," and has a foil face.

Gophers make a horseshoe-shaped mound with an exit hole on one side. A wide variety of traps, poison gases, and poison baits are available from garden supply companies to deal with gophers or moles. Or you could try chewing gum. Dig down to a part of the hole under the mound. Unwrap the gum (don't touch it and leave your scent), and puts 2 sticks down in the hole. Use large leaves (or paper) to cover the hole where he dug down, and puts dirt on top of that. (Block the light, but don't cover the gum with dirt.) Only one kind of gum works for this. It's "juicy" and "fruity."

Slugs and snails will eat stalks and leaves of tender plants. A thick growth of prostrate rosemary makes a border they will not cross, seeming to dislike its sharp foliage. To collect them, put out a saucer of beer, or of milk mixed with water, set down into the ground so that the dish's edge is at ground level. They'll crawl in and drown. Or save eggshells, dry, and finely crush. Then sprinkle them on the garden ground where the slimers go. The shell fragments stick to them and kill them. Don't use the salting method of slug murder because salt kills both slugs and garden veggies.


Tuesday, May 7, 2013

Do-it-Yourself This Mother's Day

Just in time for Mother's Day, Carla Emery offers some recipes for homemade pampering for the wonderful women in your life — or for yourself!

NOTE: To prevent allergic reactions, test a small quantity of any unaccustomed substance by rubbing it on the underside of your arm. Then wait 24-48 hours to see if a rash develops.

For Your Face 

Face Masks. A mask consists of a "binder" (which makes it adhere) and other ingredients mixed in with the binder. Choose your binder according to whether your skin tends to be oily or dry. For oily skin, use yogurt or egg white as a binder. For dry skin, choose lanolin, honey, sour cream, or egg yolk. Experiment with the other ingredients. You can blend vegetables and fruits and combine them with your binder, or use any of the recipes below. 

Wash your face clean before applying the mask. Don't ever put a mask onto the area around your eyes. Rinse off after a half hour or as soon as the mask dries. (While you're waiting, it's a good time to take a nap.) To remove the mask, use a washrag and warm water. Then use cold water to close your pores. NOTE: If you feel any irritation, rinse off immediately!
  • Oatmeal Mask: Mix together 2⁄3 c. oatmeal and enough honey to make a pasty consistency. Optionally, add 2 t. rose water. 
  • Honey/Lemon Mask: Mix 2 T. slightly warmed honey with 1 t. lemon juice. Put the mixture on your face and leave for about a half hour.
  • Peaches and Cream Moisturizer: Blend together 1 ripe peach and heavy cream. Refrigerate. Massage onto your skin wherever needed once per day.
  • Homemade Lip Gloss or Rouge: Mix a drop of food coloring with a fingerful of petroleum jelly. Kids have fun with this, and it won’t hurt their skin.
For Your Body

Herbal Bath. Make a strong tea by pouring boiling water over your chosen herbs. Let steep while you draw your bathwater. Then strain into the water. Or just put herbs right in your bath water - either loose or in a little cheese- cloth bag. Let them steep 10 minutes; then join them in there. Good herbs for bathing are chamomile, lemon verbena, mint, peppermint, and rosemary.
  • Herbal Bath Salts: With Epsom salts, mix sage, thyme, and pennyroyal; lemon balm and peppermint; lavender, rosemary, and pennyroyal; or another herb or herbal combination that pleases you. Or use Epsom salts with a few drops of your favorite fragrance or herbal oil mixed in. When bottled attractively, this makes a nice gift.


Friday, April 19, 2013

How to Plant a Tree

To celebrate Earth Day next week, we'd like to share Carla Emery's instructions for planting a tree. Emery loves trees, and is an enthusiastic advocate for guerrilla tree planting.

In general, the best time to plant a tree is in the early spring or the late fall, but research your specific plant in case of exceptions. Where to plant is the spot where the tree will have the amount of sunshine it needs - full or partial, as specified; full if not specified. And, if it isn't hardy, plant it where it will have shelter from the wind. Plant big deciduous (shade) trees on the south side of the house where they will shade in summer and let warming light enter your windows in the winter. Conifers do well as winter windbreaks on the north or windy side of the house. (Wisely placed trees can improve your home's heating/cooling situation a lot!)

Digging a Hole: Dig planting holes wide and shallow, no deeper than the rootball's size, and make them wider than needed to accommodate the tree's spreading roots. The larger the area that you dig up around the hole in preparation for planting the tree, the easier it will be for its roots to spread and find food and water. Remove any grass for 3 feet in diameter.

Planting the Rootball
  1. Unpot the Tree. Speed matters. Don't let the roots or rootball dry out. Care matters also. Don't let the roots or rootball break. Your plant either will be "bare-rooted" and wrapped in some sort of protective substance or will come with the roots in a ball of dirt in some kind of container to hold it together - a peat pot, burlap, wire basket, or bag. If it's a metal pot, cut off the pot with tin snips. Tear it off if it's made of paper. You have to get as much of the wrapping off as possible without actually harming the rootball. This may have you struggling with knives, wire cutters, etc. Untreated burlap can, if necessary, be planted with the tree.
  2. Double-Check Hole Depth. Do this by setting the tree in the hole to see how it fits. The "collar" (or "crown" or "root flare") should be just at soil level or a little above (to allow for mulch). Usually it's easy to see because you'll be looking for the same soil line that the tree had at the nursery. Trees planted too deep can die within a few years, or develop problems as many as 15 years later. 
  3.  Set Tree in Hole. Then spread out the roots. If you see any girdling, damaged, or circling roots, cut them off. Try to lay the roots out in a way that they make good, straight contact with their new soil. 
  4. Fill in Dirt. Place dirt over and around it. Don't add anything to the dirt you're going to put back into the hole to cover the tree roots - not peat moss, not fertilizer. It does more harm than good to spot fertilize a newly planted tree. This is because it tends to make the soil around the tree roots of a significantly different composition from the soil next to it. Water doesn't move normally across the difference. The result is a tree that's liable to be abnormally wet, or too dry. Don't bury incompletely decomposed organic litter around the seedling tree either. This can mess up the pH, the nutrient balances, and the populations of microscopic soil creatures. On the other hand, fully composted organic material that is evenly distributed across the top of the ground in your young tree's area could be helpful. Stomp dirt all around it to be firm and create a depression into which water can settle. 
  5. The First Soaking. When soil is dry, watering the tree as soon as possible after planting is critical for its survival. Use water also for the final settling of the soil. If additional settling occurs, add more soil, but don't step on the wet soil around the tree. 
  6. Mulch. Mulching the surface of the soil around your newly planted trees 2-4 inches deep does help them by controlling competition and gradually releasing nutrients. In nature, trees mulch themselves every fall. By keeping weeds away, retaining water, and moderating the soil temperature, mulch improves the chances of survival for your tree. But never let mulch pile up against the trunk. After mulching the planting pit, brush back the mulch that is in contact with the trunk.
  7. Avoid Staking. Natural flexing is necessary for the plant to develop a normally strong trunk and roots. Use staking only if needed to hold the tree up until the roots have become established (usually within a year). To stake, use 1 or 2 wooden stakes (pipe or rebar are too hard to pull out), which have been pounded firmly into undisturbed soil. Place the tie about a third of the way up the tree in order to allow maximum trunk movement. Use soft, flat tie material (inner tube, flat soaker garden hose, commercial products). Never use straight twine or electric, or any other type of wire, against a trunk. Remove stakes and ties as soon as possible. Trees are frequently girdled by ties that people forgot to take off. 
  8. Prune. But do not prune the tree top to "compensate for root loss." That's a myth. You may prune to take off broken, rubbing, and weak branches, but try not to remove more than 1⁄5 of the branches. 
  9. Dirt Dam. Build a circular dirt dam to create a basin  effect around the outer edge of your tree planting area to  retain water. Trees need water that soaks in deeply to establish good root systems. Water trees a lot the first year or two and during a drought. Let the root zone dry out between waterings unless your tree is a swamp variety. Five to 15 gal. a week is typical. 
  10. Care After Planting. Young trees benefit if they are irrigated, fertilized, and weeded, being a crop like any other. Water them at least twice a week. Regularly rescue them from weed and grass competitors. Or, easier and better yet, mulch around them so thoroughly the competition doesn't get through. If your trees don't grow well and aren't an obviously healthy green color, they need fertilizer. Spread some manure from your barnyard. However, there's such a thing as too much nitrogen, so spread it in reasonable amounts. For long-term care, young urban trees are most at risk for being bashed by cars or lawn mowers, or vandalized.