Thinking of adding a worm bin to your home? Worms are
great for fishing, recycling kitchen wastes, and for your garden soil. The
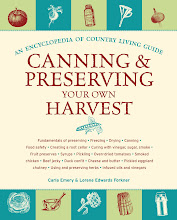
Encyclopedia of Country Living has a wonderfully comprehensive section on
building a worm bin and general care and keeping of your new friends.
(Start from the very beginning! Learn about buying worms
here)
Materials
Your worm bin can be made of wood, metal, or plastic. All
are equally good, but if you use wood it should be exterior-grade and not
aromatic, because aromatic woods (redwood, cedar, etc.) are hard on the worms.
Wooden worm boxes wear out. If you let the box dry out once in a while, it will
keep longer; building 2 boxes and alternating them allows for that. Painting
the wood with something like polyurethane varnish or epoxy also helps protect
the wood. Otherwise a wood box will last only 2 or 3 years. If using a ready-made container, be sure it was not used to hold
pesticides. Thoroughly scrub any plastic container you use. You can build or
place your bin outdoors if you live in a mild climate.
Size
The container should be no deeper than 12 inches; 8-12
inches is a good size. The worms tend to stay on the surface, so a deep
container is unnecessary and will only encourage the growth of smelly
microorganisms, which live where there is little or no oxygen. The width of
your bin depends on how much organic garbage your household produces, if you're
using the worms to recycle garbage. Your bin should have 1 square foot of
surface for each pound of garbage you'll be adding per week. (An average person
produces about 2 lb. of garbage per week.) So for a family of 2, a 2 x 2 x
8-foot bin is generally good.
The less you mess with the worms, the better. Feeding them once or twice a week is sufficient. While feeding, note whether their bedding is staying moist and any other changes. As the worms eat the food and bedding, you'll see more castings. This higher proportion of castings to bedding is not the best thing for worms. If your worms are for bait, get them out of there before they start shrinking instead of growing. On the other hand, if your goal is to grow rich humus for your garden and house plants rather than fishing worms, you can let the worms stay in the bin longer.
Worm Beddings
Worm beddings not only provide moisture to the bin but
also give you a place to bury the garbage. If left a long time, the bedding
would be entirely converted into castings by the worms. (You won't leave the
worms in the bin that long, though.) The lighter the bedding, the easier it is
for the worms to make their way around the box.
Worms in nature enjoy living in organic material such as
decaying leaves and rotten logs. Soil is not a necessary bedding ingredient,
although you might want to add a handful to the bedding to help the worms'
gizzards break down the food. But soil is heavy, and too much makes your bin
difficult to move around. Powdered limestone is also a good addition: It adds
grit, reduces acidity, and provides calcium for worm reproduction. Or you can
use pulverized eggshells for calcium.
NOTE: Do not use slake or hydrated lime. It will kill
your worms.
Worm Food
Too much food will "sour" your worm bed; the
worms won't be able to keep up, and it'll smell bad. If you give them too
little food, your worms will start getting smaller, and some will die. This
happens if your worms have reproduced more worms than your garbage or other
feeding schedule can handle. Their population will stabilize at the amount your
food for them will support. Over time you'll get a feel for how much to feed.
Growing bait worms and harvesting them regularly calls
for regular feedings. Worms for vermicomposting can get fed as much kitchen
garbage as you have. You can let it build for a few days and give it to them
once or twice a week.
How to Feed
As you dump the food out on top of the bin, don't always
put it in the same place. In fact, try to put it in a different place each time
on about a nine-day feeding cycle. Dig a shallow hole, put the garbage in it,
and cover with 1 inch of bedding. Covering the bin with a plastic sheet holds
in moisture.
Worm Food Mix
1 part screened topsoil and 1 part vegetable matter
(grass clippings, kitchen waste, etc.). Peat moss is more water-absorbent than
food scraps. If the manure is fresh, add more topsoil to prevent heating.
Heating forces the worms to the bottom of the bin, where they won't eat or
breed. The topsoil also absorbs odors and adds body to the mixture. Add chicken
mash or cornmeal to provide the carbohydrates, protein, and fats the worms need
for nutrition and to help in the formation of egg capsules. Mix very well.


No comments:
Post a Comment