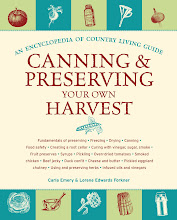
Are you taking to the trails this summer? Complete your
camping experience with the perfect campfire kitchen setup. Follow Carla
Emery's helpful tips for making a tasty meal outdoors, and if you need a dish
to pair with your newfound kitchen knowledge, check out this recipe for
mouth-watering Herb-Stuffed, Pan-Fried Golden Trout.
You need a good place to build your fire and plenty of
fuel for all its stages. You will be glad for a work table - maybe a plank
between two stumps, so you don't have to set everything on the ground. Anything
that can be cooked in frying pans, kettles, or reflector ovens can be managed
with a campfire. Don't use pans with handles that will burn. Handles that
aren't metal will promptly burn or melt. If they're all you have, let them do
it, and then you can get on with it. Stick to simple ingredients and simple
procedures when you're cooking, because you didn't bring your kitchen. If you
are able to plan ahead to do all your cooking over an open fire, you especially
need one or two cast-iron frying pans, a Dutch oven, a campfire coffeepot, and
a big pan to heat dish and washing water in. A folding grill to hold pans
secure and level is very helpful.
Starting a Fire
Campfire cooking means starting a fire and controlling it
until you don't need it any more. There's a real skill to it, which you'll
acquire with practice. The easiest way to do camp cooking is to pack a proper
wood cookstove, set it up in your camp, and use it. Gather wood on dry days and
store it under shelter to use on wet ones. You can do this in a semi-permanent
camp. If you're living on the trail, start a fire like this: Lay a little mound
of really flammable dry stuff in an open place, on dirt or sand if you can, and
away from dry brush or grass. (Please don't start a forest fire!) Place very
loosely wadded toilet paper, dry grass, the wrappers from tin cans, or one of
my book brochures crumpled up on top of that. You crumple it because paper
doesn't burn well flat. You've got to get air in there. Now make a tipi of very
slender dry sticks over that, then bigger and bigger ones over that. Set aside
some yet bigger ones to add later. Use 3 matches bunched together to start the
fire.
Frying
Try to allow enough time to let a good roaring blaze burn
down to coals. When desperate, though, you can fry on a flame. Have a circle of
big flat-topped rocks around the outside of your fire circle. They will help
hold the heat.
Stewing
Just make a place for your kettle down in there among the
rocks. Some tribes of native Americans cooked their meat by digging a hole,
lining it with a hide, filling it with water, and then adding hot rocks and
pieces of meat. This had to be the first crock pot!
Building a Mud Oven
If you have clay soil, this is a natural. Start by
building a strong, dome-shaped frame of willow branches and sticks about 2 feet
wide by 3 feet long. Cover your branch canopy with a layer of mud 6-12 inches
thick. Cut a square opening at one end to be your oven door. At the top opposite end, insert a large tin can
that is open at both ends; that will be your chimney. After the mud is
completely dry, build a fire inside and burn out all your wooden framework.
Cool and scrape the insides clean. To bake in your mud oven, first build a fire
inside it and heat the mud to red-hot. Then rake out the fire and put in your
sourdough bread, bannocks, stew, or roast. Close the door with a slab of flat
rock, and it should bake wonderfully.


No comments:
Post a Comment