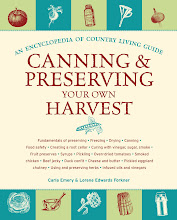
September means apple season. Just over the mountains, Eastern Washington apple orchards are brimming with fruit. Washington state grows the best apples in the world (though I suppose I’m a little biased).
Maybe you are lucky enough to have access to these beautiful orchards, or maybe you’ve just noticed apples on sale at the local grocery store. Either way, now’s the time to stock up on delicious Washington apples. With some clever preserving techniques, you can find yourself eating local apples all year long.
Canning Apples
Wash, peel, core, and quarter or slice your apples. Drop into a solution of 2 T. salt and 2 T. vinegar per 1 gal. of water. That prevents darkening. Then drain, rinse, and boil them for 5 minutes (in either thin sugar syrup or plain water). Then pack your hot fruit into hot, very clean jars, leaving 1⁄2 - inch headspace. Pour boiling liquid from the cooking over up to your headspace limit. Put on lids. Process in boiling water — for either pints or quarts: 20 minutes at altitudes 1,000 feet and lower; 25 minutes at 1,001–3,000 feet; 30 minutes at 3001–6,000 feet; and 35 minutes at above 6,000 feet.
Canned Applesauce (and Other Fruit Purees)
I make lots of applesauce. It’s a good way to preserve apples that wouldn’t keep otherwise. Cut large fruit into pieces. Simmer until soft. Add a small amount of water, if needed, to prevent sticking. Put through food strainer or mill. Add sugar to taste. Reheat to simmering (185–210˚F) and pack hot into hot jars, leaving 1⁄2 - inch headspace. Adjust lids, and waterbath can. From sea level to 1,000 feet altitude, process pints 15 minutes, quarts 20 minutes; from 1,001 to 3,000 feet, process pints 20 minutes, quarts 25 minutes; from 3,001 to 6,000 feet, process pints 20 minutes, quarts 30 minutes; above 6,000 feet, process pints 25 minutes, quarts 35 minutes.
Freezing Apples for Pie
For apples to use in making pies and so on, just wash, peel, core, and slice them. About 50 lb. of apples will make about 35 frozen pints. To keep them from turning dark, quarter (or slice) them into a solution of 1⁄2 c. salt per 1 gal. water. Or else dunk them into boiling water for 11⁄2–2 minutes. Then drain the apples, rinse them under cold water, and drain again.
Method 1:
Scald, drain, chill, cover with a thin syrup (1 c. sugar per quart of water plus 1⁄2 t. ascorbic acid), leave headspace, and freeze.
Or Method 2:
Mix 1 qt. apple slices evenly with 1 t. ascorbic acid and 1⁄2 c. sugar. Then put into plastic bags or freezer boxes, seal, and freeze.
Or Method 3:
No sugar. Just pack ’em plain. The slices break apart quite easily while still frozen for making apple pie or crisp, or you can add a small amount of water and make applesauce.
Or Method 4:
Freeze whole apples, unpeeled. Just wash, put into plastic bag, seal, and place in freezer. To use frozen whole apples, thaw under cold running water until they can be peeled. Then remove the core and slice. (Work fast; an apple that thaws before peeling darkens.)
Freezing Applesauce
Applesauce turns out nicer, I think, canned than frozen, but you can freeze it by just making it, then cooling, packaging, and freezing.
Drying Apples
You have to slice them; they aren’t dried whole. Fully ripe sweet apples are ideal. Usually they are peeled and cored and what’s left is made into doughnuttype rings about 1⁄4 - inch thick to oven dry, 1⁄8 - inch to sun dry. Let the slices fall into cold water while you are working to prevent “rusting,” 1⁄4 c. lemon juice or 1 t. ascorbic acid per 2 c. cold water. If your apples are small, wormy, or too mealy to make into doughnut rings, cut into slices of whatever shape you can. Old-timers then strung them on a thread and hung them in the sun, but now we usually just spread them out on a surface. Using an oven or dehydrator, dry them at 140˚F on a cookie sheet — turning once in a while — until they are leathery.


No comments:
Post a Comment