You want the wood just dry enough at burning time. It takes 6 months to a year to dry wood for burning. So spring-cut wood would be burned the next winter. Freshly cut (green) wood is about 50 percent water. It's heavy and burns "cold" (because all the energy it takes to evaporate that water). It also deposits a lot of flammable creosote in the chimney. Even well-dried wood is still 12-20 percent water. That's just right for burning. It's still damp enough to be a calm and manageable fire. If the water content is under 10 percent, you have to "tinder-dry" wood. This makes great kindling because it burns fast and hot. To burn tinder-dry wood you may have to damp down the airflow regulators to reduce the oxygen supply to keep from overheating the stove, or your home, and that lack of oxygen for the fire also tends to deposit creosote.
STARTING A FIRE:
On very cold mornings, if there is no other heat, I let the children build the fire. It keeps them occupied while the house is warming up. Otherwise, they just stand around the cold stove and complain. The basic idea is this: You strike a match to get enough heat to light paper, which will burn and create heat enough to light kindling, which will burn and create heat enough to ignite bigger, and then bigger, hunks of wood, which will burn with enough heat to kindle coal. That's because each thing has its "kindling point," meaning the lowest possible temperature that has the lowest kindling point (the match) and work your way up.
Laying Burnables into the Stove. Separate sheets of newspaper. Wad them up individually and put them into the firebox. Or use any discarded papers or paper containers. Add some of your most finely cut kindling on top of the paper, then a few bigger chunks of wood on top of that, then a couple of yet larger sticks on top of that. Arrange all the wood in as open a style as possible, not pressed together so that lots of air can get in there. Not only does the fire in general need air, but at first every individual stick needs an air supply. I carefully arrange them log cabin or teepee style to ensure this. Once it gets going you needn't be so particular. And start with plenty of sticks. One stick of wood never burns well alone. (There's some profound philosophy there if I ever get time to ponder it--a sermon even.) Now light the paper with a match as near the bottom as you can.
Adjusting the Dampers. Fire travels up. Always start your fire with all the dampers wide open. As the fire gets going, keep it supplied with fuel of the appropriate size for the stage it's at. As it gets going better you can gradually cut back on the draft. You will waste fuel and have a hard time heating your stove and oven if you let all your hot air go directly up the chimney, which is what it will do with all the dampers left open. So when your fire is going really well, cut back the draft--by turning the damper in the stovepipe--until it starts smoking. Then turn it back enough so you have no smoke. If the chimney damper is shut too tight, you'll have smoke all over the place. If it's open too wide, the fire will roar and consume like crazy--but it won't make the room warm. Close the damper at the back or to the side of the firebox, shut or almost shut. Adjust your front damper to the point that the fire's health seems to require. The hotter your fire the more dampening it can stand. If your fire is too slow, give it more air. If your fire still isn't burning well, try loosening up the pile of fuel.
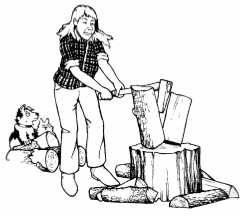
[Adapted from the "Wood Heat" section of Chapter 6: Tree, Vine, Bush & Bramble. Other topics include: Managing an Existing Stand of Trees; Reforestation; Harvesting Wood; Air Pollution; Stove Shopping; Repairing a Wood Stove; and Cooking on a Wood Stove. Illustration copyright 1994 by Cindy Davis.]


No comments:
Post a Comment