Showing posts with label homesteading. Show all posts

Monday, February 4, 2013

Starting Transplants


To do serious self-sufficient gardening, including starting early and growing late, you'll need to grow your own transplants. Commercial seedlings are usually not available except during the times of peak consumer demand. I set out cabbages, tomatoes, green peppers, and eggplant every year. It's cheaper to start your own sets from seed than to buy them from a local nursery. Try not to mail-order them.

Eggplants, green peppers, tomatoes, and cabbage have to be started in the house and then transplanted to the garden. I think head lettuce is better off raised from seed in the garden, although I've seen recommendations to start it indoors. But this depends on your climate. Start your plants for transplanting about 2 to 21⁄2 months before you plan to set them out. They will germinate easily indoors, where the
moderate temperatures that are comfortable for humans are generally perfect for seed germination too. Make your soil mixture in the fall, before the ground gets too wet: 1 part well-rotted compost and 2 parts dirt. Fill your containers to the top with dirt.

Sunshine

Start your seeds in the house or greenhouse rather than in a cloche or cold frame, because most seeds require much warmer soil to germinate than they need to grow. Inside you can give them ideal conditions in their tender early stages. They don't need much space. You can grow your transplants on a windowsill that's sunny at least part of the day. For more plants, make shelves across your window. Remove anything underneath that could be harmed by dripping water.

Water

You'll want to water the plants every other day or whenever they look dry. Several light waterings beat one big flood, which has a tendency to go right through, leaving the plant still dry.

Containers

Milk Cartons. Mary Ann Shepherd, Del Mar, CA, wrote me, "I use milk cartons as collars to blanch celery, around my new lettuce seedlings to discourage cutworms, and to start all sorts of cuttings (both flowers and vegetables) and seeds. For collars, cut off tops and bottoms. For all else, cut off tops (or open up) and use a tri-cornered beverage opener ('church key') to cut a drain hole on all four sides at the bottom (not in the bottom itself). When I go to transplant I slit the sides and bottom and plant the whole thing - the carton eventually disintegrates and you don't disturb the roots that way. My pine seedlings take about a year to germinate and grow to about 4 inches tall, and they have lived happily in milk cartons for up to 2 years before I've transplanted them." 

Cardboard Boxes. I sometimes start the plants in "seed flats" (for me, that means a cardboard box with dirt in the bottom) and then transplant to tin cans. If I don't get them out of there pretty fast, the bottoms get too soggy.

Cans. Cans of any size are good. I like those big tins that canned hams come in, and gallon tins are great. You have to punch small holes in the bottom. Big containers of dirt are better than small ones. I use 1 plant to 1 soup can or peat pot once they are started in the seed flats, or about 6 to a ham can. 

Peat Pots.  Plants in peat pots dry out fast and have to be watered every day. Set them out, pot and all, or you'll be breaking off roots that have grown right into the pot side. Tear off the part of the rim that's above ground to prevent it from acting as a wick and causing the plant to lose water. Other than that, and the fact you have to pay for them, peat pots are great.

NOTE: Be sure to label each flat with the variety of plant in it.

When to Transplant? 

The best time to set transplants out is the beginning of a cloudy, rainy spell. Cabbage sets are hardy and can go out in the garden when you plant your green onions. But in my garden, if I plant too early I
risk losing my plants to cutworms. A little later is perfect. Tomato sets can go to the garden when you're positive the frosts and near-frosts are over. Green pepper and eggplant sets should wait till the nights are not cold at all. Because plants I set out too early may be wiped out by cutworms or cold, I first set out a sampling and then wait a few days to see what happens before setting out the rest. Or you can harden off . . .

Hardening Off

You can do this by setting your containers outside during the warmer hours of the day, longer each day, before actually transplanting them into the garden. Or you can do it by transplanting your tender young plants from the house or greenhouse into a cold frame, where they will stay 2 or 3 weeks, gradually getting used to cold air and chilly nights before they go out into the regular garden in yet another transplant. For hardening plants, leave the lid of the cold frame up a bit more each day - unless you need to protect the plants from a spell of cold weather.

How to Transplant? 

To set out plants with dirtless roots, make a mud bath to plant them in. It's cold, dirty work. If they have their own dirt - for instance, plants in a peat pot that you'll plant pot and all - give them a wet hole to sit in and plenty of good water for the next few weeks. A hot, dry spell, even in May, can wipe out new, unwatered sets because their root systems haven't yet had a chance to get normally established. To set them out from a can, dig a hole and shake the plants out of the can (it's easier if the soil is soaked ahead of time). Separate them, keeping as much dirt on the roots as you can, and try not to damage the roots. Set a plant in your hole, pack dirt in around it, and give it a good soaking. Give tomato plants plenty of room to spread. They get big.

For Easy Spacing

From Earthchild Marie: "Your garden tools-shovel, rake, hoe - can be marked with a 3-corner file at 6-inch intervals for ease in setting transplants at the proper spacing. Trowel handles, marked every 3 inches, are convenient for smaller seeds and for setting transplants into the soil."

Friday, January 18, 2013

Grinding Your Own Grain

If you’ve never eaten food made from freshly ground grain, you’ve never realized how flat and insipid the flour you’re used to really tastes. You can home-grind all the grains, including rye, wheat, corn, rice, barley, and oats, as well as soybeans, chestnuts, peanuts, lentils, and dried peas to make a variety of flours. In the old days you took your grain to a mill and had the miller grind it. For payment, old-time law stipulated that the miller was entitled to one-tenth part of what he ground — except for corn, in which case the cut was one-seventh. That’s because corn is the hardest of all grains to grind. When you’re shopping, keep in mind that some mills can handle anything but corn. The basic tip is to make sure your food is dry before you put it through.

Storing Home-Ground Flour
Don't make all your grain into flour at once. Whole-grain cornmeal or wheat flour or any other flour ground at home loses quality— flavor and vitamins — almost literally every hour it waits between the grinding and the baking. Home-ground flour and cornmeal has a higher lipid (oil) content and is not degerminated or bleached. It’s therefore better food for you and any other form of life, so it won’t keep like store bought flour — unless you freeze it. As soon as your grain is ground, the oxidation processes begin; ultimately they will turn the fat in it rancid. Rancid fat is not deadly poisonous; it’s merely slightly harmful to eat and unpleasant to taste. Weevils and other insects are also more inclined to get into and be a noxious presence in flour than whole grain. Home-ground flour can also absorb odor and dampness, so it’s best to store it in an airtight container — for a small quantity, a glass jar; for large quantities, one of the 5-gal. metal or plastic cans that you can buy with fitted lids. Best of all is to grind the flour just before using it. If you plan to keep it more than a week, freeze it!

Buying Your Grinder

Shop around, comparing prices and available models.  Because there is such a confusing array of choices, tell the grinder salesperson you size of household; what grain or seeds you plan to grind, shell or crush for oil; and if you'll also be grinding feed for livestock, how many and what kind.  Health food stores or co-ops sometimes have grinders for sale, but they're not as likely to be able to give you expert advice.  Grinders are now available that can operate either by hand or by electricity at the flip of a switch.

Nonelectric Grinders

Mortar and Pestle

You can use a mortar made of a hollowed block of wood, with a heavy chunk of wood for a pestle, but stone works better. Find a flat, smooth rock with a center depression large enough to grind on and a smooth rock to grind with.

Hand-Cranked Models

A typical home grain grinder sets on a tabletop. There is usually a large screw clamp to provide firm attachment to a bench or table while you are grinding. The hand models work as long as you have the strength and will to turn the crank. Hand grinders come in various sizes. The Family Grain Mill, made in Germany, provides the best-quality flour of any of the grinders— bread quality with only one grinding! It is not too hard to turn and is reasonably priced (about $130). With the small, bargain hand grinders, it is hard work to get grain fine enough so as to not have chunks in it. The worst of the manual grinders produces a “fine meal” rather than a “flour” on the first grind. In order to get a flour grind, you have to crank very hard and put it through more than once. Then sift out the “grits” and put through again, and so on until you are satisfied with your flour. Feed the grits to your livestock, or cook for cereal.

Powered Grinding

Electric grinding is easy and quick, and blenders are easy to buy. They will work to grind a small amount of grain at any one time, such as the grain for your day’s cooking needs. But grinding is hard on blender blades, and they can’t handle bulk jobs. In most commercial mills today, flour is made by crushing the grain between a series of rollers, much like a wringer washing machine. The expensive electric models for home use can put out around 10 to 16 lb. of flour per hour, depending on size, and cost several hundred dollars. They are kitchen appliances. You plug one in and pour your grain in the hopper, and it grinds your baking flour. One or two quarts of grain at a time is about right for a small family.

Stone Mill

“Stone grinding” means that the grain is reduced to flour texture by rubbing against a stone surface in a manner similar to the old-style water-powered gristmills. Stone wheel mills, whether electric- or hand-powered, cannot be used for soybeans because of the oil from the beans, but they will produce a fine flour. Incidentally, the more a grinder grinds, the better job it does, because the stones grind themselves into a better and better fit.

Burr Mill

This type of mill crushes the grain between a stationary heavy wheel and a revolving one. These are good for people who want to grind feed for livestock as well as their own meal and flour. A burr mill grinds finer than a hand-cranked household mill, although you may need to
run it through more than once — maybe 3 times for baking flour. A burr mill is also the answer for folks who want to grind flour in larger quantities than household mills can handle. The drawback of a burr mill is that it grinds any grain fine but will not grind unthreshed grain-straw combinations. Incidentally, don’t run the burrs on empty. It wears them out faster.

Roller Mill

You can buy an attachment for some household mills that will make rolled oats, wheat, or rye flakes ($99 attachment for the Family Grain Mill). Or get the Marga Grain Roller/Flaker, which has three hardened steel rollers and can be adjusted to make different grades of either flour or flakes, $70 from the Urban Homemaker (see “Buying Your Grinder” below). A roller-type mill is the best for rolling and flaking grains, but it’s not good for making flours. They are less expensive than hammer mills and require less power. They work by mashing the grain between two clothes-wringer-type rollers. You can set a roller mill to hull, crack, and grind grain. The grain will be quite fine, but not fine enough for baking. A good roller mill with crusher rollers can chop corn or grain on the stalk, wet or dry, into silage. A roller mill is what you need if you want to grow one of the grains that doesn’t thresh clean and must be dehulled after threshing and before grinding (such as oats or barley).

Hammer Mill

Hammer mills do big grinding jobs. They also use a lot of electricity and cost a lot. The hammer mill basically grinds anything. You can put whole grain right on the stalk into a hammer mill, and it will turn out a fine livestock feed that includes roughage and avoids threshing. You can mix the feed beforehand and then mill it, and grind corn on the cob. In some cases you can adjust these grinders to make cornmeal, too, but usually a hammer mill
always lets some coarser material through and won’t make a baking-quality flour.

[Adapted from the "Grinding Your Grain" section of Chapter 3: Grasses, Grains, & Canes. Other topics include: Cereal, Fighting Pests in Grain, and growing grains. 


Friday, January 4, 2013

Seasonal Eating: Homestead Menus Throughout the Year

At any particular time of year you'll have a different set of fresh foods coming out of the garden and root cellar to complement what you have frozen and canned. Winter, cloche, cold frame, and greenhouse gardening enable you to have at least a few varieties of garden-fresh vegetables year-round. Even in chilly November, in a basic temperate-zone garden and with some attention to protection, you might be able to harvest broccoli, brussels sprouts, cauliflower, collards, cabbage, Chinese cabbage, carrots, escarole, kale, leeks, lettuce, parsnips, salsify, spinach, rutabagas, turnips, and winter radishes.

Homestead Menus Throughout the Year: Here are some menus from back in '72 and '73. Those were my banner years for home growing and good cooking. It wasn't "gourmet" or "health food" cooking. But we raised it ourselves without poisons and had plenty of food and plenty of variety. We dried fruit in our front yard. Mayonnaise was homemade. Butter was from our own churn and bread from our oven. Bacon or ham was home-cured, and sauerkraut was out of our crock, as were pickles. The root beer and ginger ale were homemade, too. We always had milk and usually an herb tea on the table.

Breakfasts. (If your chickens aren't laying, leave out the eggs.)

  1. Cornmeal mush; bread, butter, honey; soft-boiled eggs
  2. Toasted sourdough bread; pork chops; applesauce; scrambled eggs
  3. Homemade grape nuts with cream; sliced fresh peaches; poached eggs
  4. Cornmeal mush; home-canned fruit; elk sausage (1/3 pork meat); fried eggs
  5. Leftover boiled potatoes (sliced and fried); elk sausage; home-canned tomato juice; fried eggs
  6. French toast (bread sliced and dipped in an egg-milk mixture and fried); honey and butter to go on the toast; fried pork side meat; wild plums
  7. For a summer breakfast cooked outdoors: pancakes; goat's butter, honey; stewed wild apples; fried pork side meat.
Lunches.
  1. May lunch: scrambled eggs; leftover boiled potatoes fried with chopped green top-set onions; cooked, buttered asparagus spears
  2. Fried leftover cornmeal mush with butter, molasses, or honey; blackberries, fried meat; bread and butter
  3. Hamburger, sliced fried leftover boiled potatoes; tomato ketchup; bread, butter, jelly
  4. Leftover stew, extended with some fresh vegetables; bread, butter, wild plum sauce; mint tea with honey
  5. Ground leftover ham and pickle sandwiches; cottage cheese (we eat it with milk and honey--except Mike, who prefers it with salt and pepper)
  6. Sandwiches of herb bread and sliced cold venison roast; canned juice; pickles
  7. A special lunch: cold leftover steak in strips; fried potatoes and onions; hard-boiled eggs; canned applesauce; bread and butter; iced wild strawberry leaf tea
Spring and Summer Suppers
  1. Potatoes; bread; creamed onions; stewed dandelion greens; fresh raw asparagus
  2. Dandelion greens and (real) bacon bits; roast ham and gravy; potatoes; stewed rhubarb; radishes
  3. Leaf lettuce salad; radish roses; potatoes; fried meat and milk gravy; strawberries on leftover bread with cream
  4. Leftover sliced cold roast; bread and apple pudding (crumbled bread crust baked with milk, sliced cored apples, beaten egg, honey, cinnamon); warmed-up leftover gravy extended with milk (to go on the meat); boiled Swiss chard
  5. Chicken stew (made from an old layer, with carrots, potatoes, onions, turnips) and dumplings; blackberry apple bread pudding (berries, apples, milk, bread crust, and honey, baked and served with cream); iced herb tea
  6. Corn on the cob; sliced fresh fruit; roast; mustard greens; potatoes; half-cured crock pickles
  7. Carrot sticks; boiled peas; boiled new potatoes; fried chicken and gravy
  8. When you're hot and tired: potato salad (made ahead and chilled); barbecued meat (cooked by husband); tossed green salad (made by children); raspberry ice (made ahead); bread and butter
  9. Picnic: Fried chicken; potato salad; leaf lettuce salad; raspberries in whipped cream; ginger ale
Winter Suppers.
  1. Boiled sliced turnips; roast and gravy; baked potatoes; pickles; bread and butter; junket pudding
  2. Elk roast and gravy; sage dressing; baked squash; spinach; mashed potatoes; mincemeat cookies
  3. Pork chops; gravy, boiled peas; yeast biscuits; boiled potatoes
  4. Steak and gravy; mashed potatoes; cole slaw with homemade dressing; cream-style corn; crumb bread and cherry jelly; canned apricots
  5. Stew made with meat, tomatoes, carrots, cabbage; raw turnip slices dipped in herbed sour cream
  6. Leftover sliced cold roast; bread and apple pudding; mashed boiled turnips
Snacks. Snacks are for company, for husband or children famished between meals, for an afternoon tea break or a bedtime family treat. Lots of old-time farm families have a regular midmorning and midafternoon mini-meal for the working men in summer, when they are putting in long days. Maybe we take sandwiches and a gallon of cold tea out to the field and the work stops for a few minutes. 

I blacklisted store-bought cookies, potato chips, pop, and candy. But I don't fight snacks that are home-grown and home-prepared: fresh, canned, or frozen fruit; dried fruit, pickles, popcorn; homemade popsicles; homemade crackers; jerky; bread with homemade jam or honey. 

Leftovers like cold sliced roast or cold boiled potatoes are good with some salt or butter. My husband Mike doesn't like to eat leftovers, except potatoes and meat, so if somebody doesn't snack them up, the chickens or pigs get them--except for bread, which metamorphoses into bread pudding or lunch dishes that I serve when it's just me and the children.

[Adapted from the "Menu Making: 365 Independence Days" section of Chapter 7: Food Preservation. Other topics include: Seasonal Eating; Use What You Have; and A System for Menu Planning. Illustration copyright 1994 by Cindy Davis.]

Friday, December 28, 2012

The Homesteader's Achievement Checklist (aka New Year's Resolutions)


  1. Grind a handful of grain coarsely for cereal. Grind finely for flour.
  2. Mix, knead, raise, punch down, raise, and bake a loaf of bread.
  3. Put on a bee suit and open a hive.
  4. Make yogurt.
  5. Start with cream and take it through every step until it has become a salted ball of butter and a glass of buttermilk.
  6. Make cottage cheese.
  7. Make hard cheese.
  8. Milk a goat.
  9. Put a cow in the stanchion and milk her.
  10. Feed the poultry and gather eggs.
  11. Clean out a rabbit hutch.
  12. Plan and cook a meal in which the food is 100 percent home-grown.
  13. Raise, catch, kill, scald, pick, singe, cut up, and cook a chicken.
  14. Dry a batch of fruit or vegetables in a food dryer.
  15. Take out the ashes. Build a fire in a wood stove. Adjust the dampers.
  16. Freeze a batch of a fruit or vegetable.
  17. Make a batch of sourdough starter. Cook a meal of sourdough pancakes using that starter.
  18. Make homemade noodles and/or crackers.
  19. Dry and save seeds from an annual and/or a biennial.
  20. Separate milk. Ake apart, wash, dry, and reassemble the separator.
  21. Make a batch of homemade ice cream using a crank freezer.
  22. Harness a team of horses (or oxen). Hitch them up to an implement or wagon. Till a field with them.
  23. Build housing for animals. Repair or build a fence.
  24. Correctly identify 10 different herbs from sprigs laid out on a table.
  25. Make a pot of herb tea from herbs you have grown and harvested.
[Adapted from the "Appendix" section. Other topics include: Chronology of This Book; Various Editions Described; World Records This Book May Have Set; A Final Exam for You; and Index.]


Friday, November 30, 2012

How to Start a Fire in a Wood-Burning Stove


Burning wood seems easy and natural to me. But I live in a timber-producing area, have timber here and on the farm, and a sawmill and wood products plant both just right down the road. Correspondents tell me that in the East, wood is very scarce and very high-priced, that wood stoves are hard to come by, and that insurance companies won't insure a home that is heated with wood. Anyway, if you haven't got dead trees around then a wood cookstove isn't necessarily right for you.

You want the wood just dry enough at burning time. It takes 6 months to a year to dry wood for burning. So spring-cut wood would be burned the next winter. Freshly cut (green) wood is about 50 percent water. It's heavy and burns "cold" (because all the energy it takes to evaporate that water). It also deposits a lot of flammable creosote in the chimney. Even well-dried wood is still 12-20 percent water. That's just right for burning. It's still damp enough to be a calm and manageable fire. If the water content is under 10 percent, you have to "tinder-dry" wood. This makes great kindling because it burns fast and hot. To burn tinder-dry wood you may have to damp down the airflow regulators to reduce the oxygen supply to keep from overheating the stove, or your home, and that lack of oxygen for the fire also tends to deposit creosote.

STARTING A FIRE:
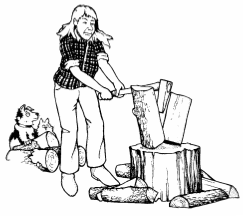
On very cold mornings, if there is no other heat, I let the children build the fire. It keeps them occupied while the house is warming up. Otherwise, they just stand around the cold stove and complain. The basic idea is this: You strike a match to get enough heat to light paper, which will burn and create heat enough to light kindling, which will burn and create heat enough to ignite bigger, and then bigger, hunks of wood, which will burn with enough heat to kindle coal. That's because each thing has its "kindling point," meaning the lowest possible temperature that has the lowest kindling point (the match) and work your way up.

Laying Burnables into the Stove. Separate sheets of newspaper. Wad them up individually and put them into the firebox. Or use any discarded papers or paper containers. Add some of your most finely cut kindling on top of the paper, then a few bigger chunks of wood on top of that, then a couple of yet larger sticks on top of that. Arrange all the wood in as open a style as possible, not pressed together so that lots of air can get in there. Not only does the fire in general need air, but at first every individual stick needs an air supply. I carefully arrange them log cabin or teepee style to ensure this. Once it gets going you needn't be so particular. And start with plenty of sticks. One stick of wood never burns well alone. (There's some profound philosophy there if I ever get time to ponder it--a sermon even.) Now light the paper with a match as near the bottom as you can.

Adjusting the Dampers. Fire travels up. Always start your fire with all the dampers wide open. As the fire gets going, keep it supplied with fuel of the appropriate size for the stage it's at. As it gets going better you can gradually cut back on the draft. You will waste fuel and have a hard time heating your stove and oven if you let all your hot air go directly up the chimney, which is what it will do with all the dampers left open. So when your fire is going really well, cut back the draft--by turning the damper in the stovepipe--until it starts smoking. Then turn it back enough so you have no smoke. If the chimney damper is shut too tight, you'll have smoke all over the place. If it's open too wide, the fire will roar and consume like crazy--but it won't make the room warm. Close the damper at the back or to the side of the firebox, shut or almost shut. Adjust your front damper to the point that the fire's health seems to require. The hotter your fire the more dampening it can stand. If your fire is too slow, give it more air. If your fire still isn't burning well, try loosening up the pile of fuel.

[Adapted from the "Wood Heat" section of Chapter 6: Tree, Vine, Bush & Bramble. Other topics include: Managing an Existing Stand of Trees; Reforestation; Harvesting Wood; Air Pollution; Stove Shopping; Repairing a Wood Stove; and Cooking on a Wood Stove. Illustration copyright 1994 by Cindy Davis.]


Friday, November 9, 2012

Brandied Fruit (Tutti-Frutti) and Chutneys


BRANDIED FRUIT

Foods preserved in alcohol are "brandied." Wines and foods containing over 14% alcohol by volume are self-preserving. Wines and foods with a weaker concentration of alcohol can become sour and vinegary. Brandied food should be kept cool and airtight. Burying it deep in the ground works well. The trouble with preserving food by brandying it is that it will give you a hangover. I'd hate to have to get drunk to eat.


Tutti-frutti is the most common and versatile sort, because you can eat it straight, use it for an ice cream or general dessert topping, or make a sort of fruit cake out of it (actually better than eating it straight).

Incidentally, baking or boiling evaporate most, but not all, alcohol in any recipe. Despite the cooking, 10-15 percent of the alcohol will remain. You can indeed get intoxicated from fruit cake--if you eat enough of it.

EARLEN'S TUTTI-FRUTTI
You can start with 1 1/2 c. fruit and 1 1/2 c. sugar. For your first mixture, half-drained crushed pineapple and half-drained chopped canned peaches are good, along with 6 chopped maraschino cherries. (Peaches brandy best, and after them, cherries). A package of dry yeast stirred in helps to get the fermentation off to a quick start. Stir it several times the first day. At least every 2 weeks after that, add 1 more c. sugar and 1 more c. fruit. Alternate your fruit so you don't end up with all the same thing. Don't put it in the refrigerator, but don't have it too near the heat either.

Once you get it going, you can give up a cup of "starter" to friends who can soon work up their own supply of tutti-frutti from it. The mixture is at its best after 4 weeks have passed. you can take out fruit to use as needed, but try not to let what's left get below 1 cup. To have more, just add more fruit and sugar ahead of schedule. You can use fresh, canned or frozen fruits such as Bing cherries, raspberries, blueberries, apples, pears, or fruit cocktail as well as the first ones I mentioned. But if pears and fruit cocktail are used, treat them gently so they don't become too mushy. Don't use bananas.

Be sure to keep the fruit under the liquid. You can use a weighted saucer to hold it down. Fruit exposed to air will darken in color and taste too fermented. 

TUTTI-FRUTTI FRUITCAKE
Mash 1/2 c. butter together with 1 c. sugar until well mixed. Add 4 eggs, 3 c. flour, 2 t. soda, 1 t. cloves, 1 t. allspice, 2 c. your brandied fruit of any sort, 1 1/2 c. applesauce, 1 c. raisins, and 1 c. nuts. This bakes best in an angel food -type pan because it is very moist--a buttered 9-inch tube pan would be right. It takes a long time to back--70 or 80 minutes or more in a moderate oven (350 degrees F).

CHUTNEY

Chutney is a fruit or vegetable mixture, flavored with spices, and cooked with sweetening and vinegar until it has a thick, jam-like texture. You can use slightly overripe fruits and vegetables for this. Possible vegetable ingredients for a chutney are beets, carrots, eggplant, onions, peppers, pumpkins, rutabags, squash, tomatoes, or turnips. Fruit ingredients (fresh or dried) could be apples, bananas, berries, citrus fruits, cranberries, plums, lemons, mangoes, peaches, pears, or rhubarb. Typical herbs and spices in a chutney are allspice, bay leaves, cayenne, chili, cinnamon, cloves, coriander, cumin, garlic, ginger, horseradish, juniper, mustard seed, paprika, and/or peppercorns. Some sugar is usually added: white, brown or mollasses. (Most chutneys are dark colored).

BASIC CHUTNEY
Combine 1 1/2 c. sugar, 3/4 c. wine or cider vinegar, 1/2 c. chopped onions, 1/2 c. raisins, quartered and thinly sliced lemon, 2 T. minced fresh ginger root, 1 t. black mustard seed, 1 t. salt, 1/2 t. cardamom, and 1/2 t. red chile pepper flakes in a big pan. Heat to boiling. Add 2 lb. peeled and chunked fruit (peaches, mangoes, or pears are good in this recipe) or vegetable from list above to the pickling sauce. Cook, stirring often, until the food is tender but not mushy. 

GREEN TOMATO CHUTNEY
Put 1/2 lb. finely chopped onion in a pan with 1/4 c. vinegar. Cook on low heat until soft. Add 2 lb. green tomatoes, 1/2 lb. peeled, chopped apples, 3/4 c. vinegar, 1/2 lb. sugar, 1/2 t. salt, and 1 t. of a pickling spice mixture (in a spice bag). Cook until the tomatoes and apples are soft. Boil until thick. 

PLUM CHUTNEY
Chop 1/2 lb. onions. Cook on low heat in 2 T. vinegar. Remove the pits from 2 lb. plums. Simmer them in 2 c. vinegar with 1 t. ground ginger, 1 t. cloves, and 1/2 t. dry mustard. Stir in 1/4 lb. sugar until dissolved. Boil until thick. 

[Adapted from the "Sugaring--and Fruit Preservation" section of Chapter 7: Food Preservation.  Illustration copyright 1994 by Cindy Davis.]

Friday, November 2, 2012

Preparing for Winter: Ways to Keep the House Warm While Saving Energy


Summer is manageable just about anywhere. It's the other three seasons, especially winter, that you want to really prepare for. You have to prepare to keep warm and also keep fed. (There's not much wild food forage outdoors in February.) Yet you, me, and everybody else could get along with a lot less heat if we had to.


The Stove. When you heat with wood, the fire goes out in the stove or fireplace after you go to bed. (The fire builder in cold weather is every morning's hero!) I was raised that way, and I live that way. There are ways to keep warm, and in this section I'm passing them on. Check the damper on your wood-burner to make sure it's closed, so you won't lose heat up the chimney. If your heat stove is in the kitchen, a nice wide, high doorway--about twice or more the usual width, with no door of course--will help heat circulate into an adjoining room where you want it, such as your living room. (For lots more on stoves, wood, etc. see Chapter 6.)

Newspaper Uses. If getting firewood is a problem, have you considered burning newspapers? You can roll them up tightly and make your own sort of presto log. You can make an emergency blanket for the bed out of them too.

The Bathroom. This is an important room. People using the bathroom immensely appreciate warmth. If pipes are not at risk of freezing, close off the bathroom and heat it only when needed. You can put a little quick-response electric space heater in there, if you have electricity, to be turned on only when someone is using the room. But if you have water pipes in the bathroom that might freeze and burst (and that can happen if it gets cold enough, even if you leave the water running), then keeping the pipes warm enough is even more important than keeping people warm! If you leave water running, it is less likely to freze; running water can withstand a lot more cold before freezing up than can standing water in the pipes. The colder it is, the larger the volume of water you must keep running to keep it from freezing. Let it run in both your kitchen and bathroom.

HOUSE INSULATING

Windows. If you're cold and don't have heavy thermal drapes that can completely cover your windows, hang heavy-textured blankets over them. Wave your hand slowly around suspicious areas--such as around the side of your windows and above and below your doors--to find out where cold drafts are coming in. Then plug those holes by tacking or taping newspaper or plastic over the windows and adding an insulating lining to the edges of the door. Storm windows on the outside of windows help insulate. If you don't have the regular glass kind of storm window, improvise by nailing a layer of heavy, clear plastic over the outside of all windows. Tack it down all the way around the outside edges of the window, nailing strips of cardboard or thin wood on top of the plastic to prevent it from ripping off in strong winds. We do this every fall and take it off every spring. With the plastic storm windows on the outside and heavy curtains on the inside, not much heat is lost.

Doors. If you don't have an enclosed porch to buffer the air flow between outside and inside the house every time that door opens, install storm doors to hold in your heat. (Even with a porch, they're a good idea.) Make sure the storm doors have good springs so they will stay tightly shut. You don't need but one door in the wintertime. Seal off the others and you'll save heat. Frances E. Render of Billings, Montana (where it gets really cold) wrote me a great "dire emergency" method for sealing doors and windows that let cold in around the edges: Tear cloth strips, wring them out in water, and poke them in those drafty cracks. As they freeze, they will expand and make a perfect seal. Frances has used this trick "on the north side during temperatures of -30 to -40° F with a strong wind and it worked great!" It helps to have a porch-type enclose outside with one operating door.

Sealing Off Spaces. If you don't have doors on the pantry, closets, and similar non-lived-in spaces that don't need to be heated, hang blankets or plastic curtains over their openings. Seal off as many infrequently used rooms as you can for the duration of the cold weather. Keep the bedroom doors shut so you don't have to heat those rooms during the daytime. For more ideas, read Superinsulated Houses and Air-to-Air Heat Exchangers by William A. Shurcliff.

If you do all these things, and your fire is burning fine, by now you ought to be feeling warmer. Still cold? Try the Eskimo technique for keeping warm. Always wear lots of clothes, each rich food, and take a dog to bed--a nice furry variety. If you're still cold, take two dogs to bed, or three. If you're still cold--get married! If that doesn't do it, I give up!

[Adapted from the "Living Simply 'Primitively'" section of Chapter 1: Oddments. Illustration copyright 1994 by Cindy Davis.]

Friday, October 26, 2012

Preparing for an Emergency: Light and Heat


When I was a little girl, rural electrification was just reaching rural Montana, and we were all very excited about it. We kept plenty of matches in a watertight metal box though, in case the electricity failed and we had to fall back on older technologies. Always keep on hand a way of making light if the electricity goes off. All the adults in the house should have a few candles, a candle holder, and a box or book of matches right with them in their rooms, situated so that the candle could be lit and mounted in a firm position even when struggling to see in the dark. In addition to the candles, a few kerosene lamps, Coleman lanterns, "barn lights," or other such devices would be helpful.

How Many Candles? You almost can't have too many. When you are depending on them, they burn down all too fast. The general rule is to store at least three candles per day you are storing for, or 21 per week; but it's good to have more. Fat ones burn down more slowly than thin ones. If you happen onto a candle sale, buy a bunch. They keep just about forever. Liquid wax candles or 100-hour candles are sold by AG Starlite.

Instant Candles. In an emergency, you can make an instant candle out of a string, with one end lying in some cooking oil (or any fat, even bacon grease) in a dish and the other end hanging over the edge and burning. You get more light if you use 7 or 8 strings. They're very smoky, but if you're desperate for light, anything will do.

Outdoor Lights. A powerful, portable battery-operated light and extra batteries for it is the cleanest, safest, easiest emergency lighting system. Carry one in your car, and keep one or two in your emergency kit at home. We used Coleman lanterns for night trips to the barn before we got electric barn lights. They're still good for making outdoor light for farming, camping, or hunting, although "barn lights" and electric lamps are also good options now. They're all very portable in the lighted state. Many camping/hunting stores carry them. You have to buy a special fuel for Coleman lanterns, but a little goes a long way. You also have to buy a "mantle" which functions as a wick and lasts pretty long unless a curious finger pokes it. In that case, it immediately shatters into ashes, and you have to install a new one to have light again. Don't throw away your instruction booklet, because they can seem complicated until you get used to them. Sold by C.Crane and Alladin Mantle Lamp Company.

Kerosene Lamps. I remember kerosene lamps in our house. Electric lights were such an improvement--more light, no odor, no lamps to fill or wicks to turn up or lamp glasses to clean or break. Kerosene lamps are good indoors but not outdoors because they blow out easily. Practice using yours when you have plenty of light, so it will be easy when you need to light it in the dark. Sold by Lehman's.

Smoke Detector. Since you might be burning all those flames to help you cook and see, better also make sure you have a battery-powered smoke detector.

Emergency Heat. Plan a way of heating and cooking without electricity, and store a fuel supply for that system. For most people, that backup is a wood burner, even a fireplace. But fireplaces are not heat-efficient and are tough to cook on, so a wood stove, properly installed with a stovepipe, is better. Keep a supply of newspapers and kindling for starting fires and wood for burning, or you'll be burning your furniture if it's that or freeze. To keep the fire going for heat and bottle warming, you have to train yourself to wake up and put more fuel in the stove when needed.

NOTE: You absolutely cannot use charcoal grills or hibachis to heat a house. They give off carbon monoxide, a colorless, odorless, poisonous gas that has killed a lot of people who tried that. A propane or gasoline camp stove can be used in the house, and propane stores well. 

[Adapted from the "Living Simply 'Primitively'" section of Chapter 1: Oddments. Illustration copyright 1994 by Cindy Davis.]